| Health | Double Jumps/Airdashes | Dash Type | |||||||
|---|---|---|---|---|---|---|---|---|---|
| 11,000 | 1 | Run | |||||||
| Overdrive Duration (in frames) | |||||||||
| 100 – 90% | 89 – 80% | 79 – 70% | 69 – 60% | 59 – 50% | 49 – 40% | 39 – 30% | 29 – 20% | 19 – 10% | 9 – 0% |
| 180 | 210 | 240 | 270 | 300 | 390 | 420 | 450 | 600 | 600 |
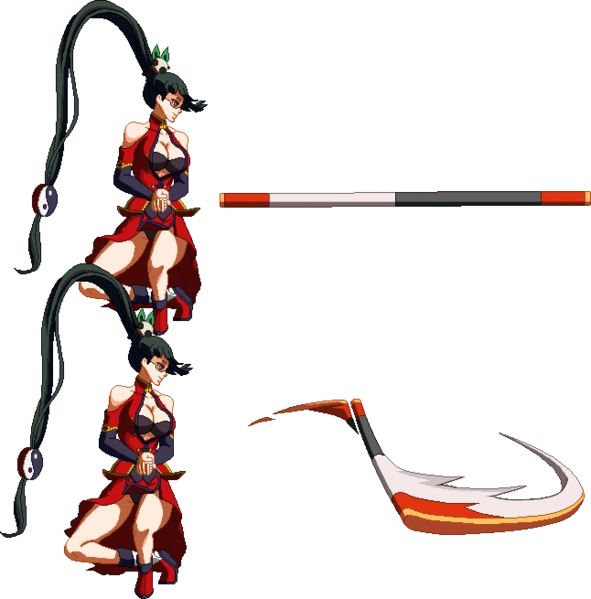
Litchi Faye Ling is a mad queen of cross-ups, with many moves that focus on hitting from left and right in a flanking fashion with herself attacking as well as her staff flying all around the place. With this, she sports many powerful combos to brutally whittle her foes’ HP to nothing. But she is rather hard to pick up and is not meant for beginners. And she is rather execution heavy, often sporting strict timings on her combos. She is a little easier to use while staffless, but may have some trouble approaching the opponent.
While with staff, Litchi does not have many moves to combo from or into in her arsenal. Her main advantage in this style is the confusing range of her Mantenbō, which allows occasional surprise pokes to be dealt easily, but can hardly allow further combo. Players may have to rely on her Distortion Drives since Litchi has more time to input her DD in this mode. All Green (緑一色 Ryūisō) is particularly useful in catching the opponent off-guard and The Great Wheel (大車輪 Daisharin) is excellent to maintain pressure on the opponent.
Without the staff, Litchi is surprisingly flexible, being able to mix a lot of moves of different speed, power and even type (high/mid/low) with just her B and C moves alone. Her Three Dragons (三元脚 Sangenpai) combo, which mixes up low, mid and high can be quite unpredictable and lead to high damage. In fact, she may even sport the same rush-down power that Ragna has. Players who excel in rush-down may find staffless Litchi a very interesting style to gradually familiarize themselves with her. Additionally, players with experience from playing Carl may use their positioning skills to sandwich the opponent between Litchi and her staff to add Thirteen Orphans (国士無双 Kokushimusō) into the combo to maximize damage.
However, the playing in one style does not allow Litchi’s full potential to be released. What makes her an unpredictable character is her ability to synchronize the two styles: with and without staff, to create a complex combo, almost like Carl’s style. This is the main reason why Litchi is a hard pick in the first place. While with staff, she does not have many D moves with enough stun time to connect into a staffless combo, and while without staff, it is even more difficult to recall the Mantenbō back to switch style without interrupting the combo. However, once used to her timing, Litchi players can easily corner the opponent, force counter hits and deal massive damage in a single insane combo.
Despite this, due to the complexity of her setups, Litchi is among one of the characters with a high learning curve, making most beginners have a hard time mastering her.
As of BlazBlue: Continuum Shift, Litchi does more wonders on counter hits only, nerfing her to an extent, but is still lethal. Her new additional 4D and 6D are very useful for connecting a staffless combo after dealing a fair amount of damage while still with staff. Players must treat her as a character who plays in two different fields, and those who’ve had experience with characters that have a great zoning game or those that have different modes of play (namely stances to switch in between) and those that are hardcore for combo timings should have little to no trouble picking her up. Outside of combos, Litchi must be watching her opponent often, as making the wrong move can cost her dearly.
In Continuum Shift Extend, Litchi’s air combo potential decreases quite a bit due to the nerfing of her j.B.
Command list[]
Basic moves with Mantenbō[]
| Input | Damage | Heat gain | |||||||||
|---|---|---|---|---|---|---|---|---|---|---|---|
| 300 | 124 | ||||||||||

|
Generic forward back-handed knocking slap. Only hits people standing, can only combo on CH. | ||||||||||
| Input | Damage | Heat gain | |||||||||
|---|---|---|---|---|---|---|---|---|---|---|---|
| 720 | 298 | ||||||||||
|
Knee to the stomach with the leading leg. Loses to sliding moves like Noel’s 3C, but this is one of her best pokes via the recovery time and due to Litchi leaning forward quite a bit. Thanks to her 2A, you have to learn to hit confirm out of this move pretty well if you want to do well with her. The best way to space this move is so that her knee does not actually touch the other character’s hitbox; let the Mantenbō do the work for you. Also this is jump cancelable on block. On airCH, either 5C(1) Tsubame Gaeshi or 6A Three Dragons (more stable). | ||||||||||
| Input | Damage | Heat gain | |||||||||
|---|---|---|---|---|---|---|---|---|---|---|---|
| 430*2 | 178*2 | ||||||||||
|
Horizontal extension of the Mantenbō via a forward turning-and-stepping twin-palm strike with a wide gap in between said palms. 2 hits, cancelable on either hit. This move is primary combo fodder, but at the same time works as an in-and-out poke somewhat. Once you go into it the only move you can chain into on block is 3C. The most important thing about this move is using it to control your combos. Off a point blank 5B, if you are going into a 3C combo or Straight Through C combo, you can let both hits hit. If you are spaced, let both hits hit if you think its right and are going into a 3C combo. If you are going to do a Straight Through C combo, just do one hit and go right into it. In the corner just always do both hits. Its other use is to deal with moves with invulnerability. For example, you throw break Noel and she hits 5D. If you 5C, the first hit will miss but the 2nd hit will hit her. It is good at beating backdashes. Also just space with it sometimes, it has more range than 5B. | ||||||||||
| Input | Damage | Heat gain | |||||||||
|---|---|---|---|---|---|---|---|---|---|---|---|
| 300 | 124 | ||||||||||

|
'Door knock'. Only combos into 5B on crouchers or CH. | ||||||||||
| Input | Damage | Heat gain | |||||||||
|---|---|---|---|---|---|---|---|---|---|---|---|
| 680 | 281 | ||||||||||
| Full-split that covers the ground, and extends the Mantenbō across the ground. This move goes under plenty of moves, like Jin’s TK ice swords and Noel’s 6A. Her best low by far. Meant for poking. You can combo into Straight Through C raw but its pretty tough. Also you can chain this into 6A, use that for some variation. | |||||||||||
| Input | Damage | Heat gain | |||||||||
|---|---|---|---|---|---|---|---|---|---|---|---|
| 700 | 289 | ||||||||||

|
Stabs upward with Mantenbō via an upward punch attack from a backward leaning crouch. It is nowhere near as abusable as Ragna’s 6A or Noel’s 6A as far as anti-airs go. Instead, it is an excellent anti jump tool. Just dashing and throwing it out is pretty solid. On random hit, combo into Tsubame Gaeshi. You can normally go into Straight Through A, but it requires proper height, and you have to know its going to hit. Tsubame Gaeshi you can just do on reaction. This move staggers into 5C, so it is good vs people who like to twitch. | ||||||||||
| Input | Damage | Heat gain | |||||||||
|---|---|---|---|---|---|---|---|---|---|---|---|
| 620 | 256 | ||||||||||
|
Overhead Mantenbō smash via a turning downward chop attack in a stance. There is 2 hitboxes on this move; one is her actually chopping down, and one is the Mantenbō coming down. If for some reason you mess up the spacing and they are in between your staff and your hand, this move will completely whiff (bad). On Rachel you can 5B her when she is in OTG state. This move is one of 4 moves that have a Mantenbō return state. Be aware that the farther the staff is when you use this move, the longer the return time. | ||||||||||
| Input | Damage | Heat gain | |||||||||
|---|---|---|---|---|---|---|---|---|---|---|---|
| 820 | 339 | ||||||||||
|
Horizontal inward turning kick straight forward, Mantenbō extends out from her foot. Great fear move, but loses to sliding attacks just like 5B does. On CH this leads into untechable wallbounce. If you space well this has limited use as an anti-air. Normally off CH go into dash 5B Tsubame Gaeshi into whatever followup depending on where you are on the screen. Also, it is one of 4 moves that has a Mantenbō return state. | ||||||||||
| Input | Damage | Heat gain | |||||||||
|---|---|---|---|---|---|---|---|---|---|---|---|
| 250*4 | 103*4 | ||||||||||
|
Thrusts the staff horizontally forward in very a short-ranged boomerang toss. If you hit with it in the corner (or anywhere really) it leads to huge damage combos, but it is really hard to hit with. You can usually nab people by doing 6B…6C in a blockstring. This move also has a Mantenbō return state. | ||||||||||
| Input | Damage | Heat gain | |||||||||
|---|---|---|---|---|---|---|---|---|---|---|---|
| 300 | 124 | ||||||||||

|
Upward-diagonal palm attack. Good, fast anti-air aerial normal. Use when they are above you. | ||||||||||
| Input | Damage | Heat gain | |||||||||
|---|---|---|---|---|---|---|---|---|---|---|---|
| 620 | 256 | ||||||||||
|
Full split kick in a turning motion, with the Mantenbō spinning in an oval around her legs. Hits absurdly beneath and above her legs. Great move to space with and get random hits. Jump around and hit this button a lot. The best way to space this move is around her thighs/knees, that’s where it looks like the Mantenbō is spinning. Great for crossups. | ||||||||||
| Input | Damage | Heat gain | |||||||||
|---|---|---|---|---|---|---|---|---|---|---|---|
| 780 | 322 | ||||||||||
|
Outward back-turning swat-swing with the Mantenbō. This move is great if people are getting around your j.B spacing by just jumping at you and hitting fast close range moves. On CH, like 6B, she gets untechable wallbounce. However it does not hit below her at all, so be careful. | ||||||||||
| Input | Damage | Heat gain | |||||||||
|---|---|---|---|---|---|---|---|---|---|---|---|
| 720 | 298 | ||||||||||
| Palms forward in a crouching stance and sends her staff forward just like her 6C, only it sweeps the ground. Hits low, pretty slow, but great range. It slides across the ground from her hands, pretty useful if you read a backdash. Pretty much combo fodder outside of backstep reads, but it has other situational uses, like beating moves that are weak vs lows/foot attribute. Has a Mantenbō return state. Evasion move, inflicts no damage, can be done without staff or with staff. | |||||||||||
| Input | Damage | Heat gain | |||||||||
|---|---|---|---|---|---|---|---|---|---|---|---|

|
New move in Chronophantasma. Litchi performs a single-handed handstand kick (akin to the Senkyūtai; lit. Drilling Bow Thigh in other fighting games) and recovers into a backflip. Extremely high anti-air that can easily make opponents second-guess their aerial approaches, especially when they try to bait Tsubame Gaeshi’s usage. Spiral launches on hit. Has solid vertical reach, but a very poor horizontal hitbox. It also cannot be jump-cancelled despite its nature, requiring either a Rapid Cancel or specific special moves. Staff version can be cancelled into 6B on hit or block, though on hit the 6B will most likely miss. | ||||||||||
Basic moves rod-less[]
| Input | Damage | Heat gain | |||||||||
|---|---|---|---|---|---|---|---|---|---|---|---|
| 300 | 124 | ||||||||||
|
|
Same as 5A. | ||||||||||
| Input | Damage | Heat gain | |||||||||
|---|---|---|---|---|---|---|---|---|---|---|---|
| 450 | 186 | ||||||||||

|
Pretty much the same as 5B. MUCH smaller range. Generally used in combos. | ||||||||||
| Input | Damage | Heat gain | |||||||||
|---|---|---|---|---|---|---|---|---|---|---|---|
| 620 | 256 | ||||||||||

|
Litchi releases a big burst of ki with the same animation as her 5C. This move is actually pretty good, on CH they go into collapse animation. It beats sliding moves. You see this a lot in combos but if for some reason you are split from the staff, this is a good move to fish for a CH with. | ||||||||||
| Input | Damage | Heat gain | |||||||||
|---|---|---|---|---|---|---|---|---|---|---|---|
| 300 | 124 | ||||||||||
|
|
Same as 2A. | ||||||||||
| Input | Damage | Heat gain | |||||||||
|---|---|---|---|---|---|---|---|---|---|---|---|
| 450 | 186 | ||||||||||
| Similar to 2B. Less recovery since she does not have to bring back the Mantenbō, still hits low. | |||||||||||
| Input | Damage | Heat gain | |||||||||
|---|---|---|---|---|---|---|---|---|---|---|---|
| 600 | 248 | ||||||||||

|
Same as 2C. Still air unblockable, but even more of an anti-twitch move now that she does not have Mantenbō. | ||||||||||
| Input | Damage | Heat gain | |||||||||
|---|---|---|---|---|---|---|---|---|---|---|---|
| 600 | 248 | ||||||||||
|
Overhead hand smash. Same as 6A. However the only hitbox is the chop. | ||||||||||
| Input | Damage | Heat gain | |||||||||
|---|---|---|---|---|---|---|---|---|---|---|---|
| 660 | 273 | ||||||||||
|
Not as good as her 6B. More freedom in chaining. Still weak against slides. | ||||||||||
| Input | Damage | Heat gain | |||||||||
|---|---|---|---|---|---|---|---|---|---|---|---|
| 300, 900 | 124, 372 | ||||||||||
|
High-aimed back-turning kick to a backward backflip spiking-kick. First hit hits mid, second is overhead. Primarily used in combos more than anything else. | ||||||||||
| Input | Damage | Heat gain | |||||||||
|---|---|---|---|---|---|---|---|---|---|---|---|
| 300 | 124 | ||||||||||
|
|
Same as j.A. | ||||||||||
| Input | Damage | Heat gain | |||||||||
|---|---|---|---|---|---|---|---|---|---|---|---|
| 500 | 207 | ||||||||||
| Far inferior to her j.B counterpart. Good air-to-air and crossup. In CS:EX, it can be done in the air only once. | |||||||||||
| Input | Damage | Heat gain | |||||||||
|---|---|---|---|---|---|---|---|---|---|---|---|
| 600 | 248 | ||||||||||

|
Windmill-like motion kick. Good air attack, probably her best staffless. Best when the opponent is below you. On hit in Mantenbō return, follow up with Tsubame Gaeshi. In CS:EX, it can be done in the air only once. | ||||||||||
| Input | Damage | Heat gain | |||||||||
|---|---|---|---|---|---|---|---|---|---|---|---|
| 620 | 256 | ||||||||||
| Sweeps with her dress. Faster than 3C, but its normally used for combos. | |||||||||||
| Input | Damage | Heat gain | |||||||||
|---|---|---|---|---|---|---|---|---|---|---|---|

|
New move in Chronophantasma. Litchi performs a single-handed handstand kick (akin to the Senkyūtai; lit. Drilling Bow Thigh in other fighting games) and recovers into a backflip. Extremely high anti-air that can easily make opponents second-guess their aerial approaches, especially when they try to bait Tsubame Gaeshi’s usage. Spiral launches on hit. Has solid vertical reach, but a very poor horizontal hitbox. It also cannot be jump-cancelled despite its nature, requiring either a Rapid Cancel or specific special moves. Staff version can be cancelled into 6B on hit or block, though on hit the 6B will most likely miss. | ||||||||||
Throws[]
| Input | Damage | Heat gain | |||||||||
|---|---|---|---|---|---|---|---|---|---|---|---|
| 0*2, 1400 | 0*2, 579 | ||||||||||
|
Standard throw, leads to her strong mixup game. She can special cancel just before the kick in order to add damage (if she’s staffless). | ||||||||||
| Input | Damage | Heat gain | |||||||||
|---|---|---|---|---|---|---|---|---|---|---|---|
| 0, 1400 | 0, 579 | ||||||||||
|
Carries a bit farther than her forward throw. | ||||||||||
| Input | Damage | Heat gain | |||||||||
|---|---|---|---|---|---|---|---|---|---|---|---|
(in the air) |
0, 1400 | 0, 579 | |||||||||
|
Average size airthrow, leads to corner combo. | ||||||||||
Counter Assault[]
| Input | Damage | Heat gain | |||||||||
|---|---|---|---|---|---|---|---|---|---|---|---|
| 0 | 0 | ||||||||||
|
|
Average Counter Assault, it can be low profiled. | ||||||||||
Crush Trigger[]
| Input | Damage | Heat gain | |||||||||
|---|---|---|---|---|---|---|---|---|---|---|---|
| 1000 | |||||||||||
| Enters a stance and summons a pale energy dragon of chi/ki/qi to slam at her foe with. An excellent Crush Trigger. This has all around use as a tool for combo extensions, mixups, and pressure. Since she steps back, it dodges a lot of reversals. Cannot guard crush during Overdrive. | |||||||||||
Drive[]
| Input | Japanese name | English name | Damage | Heat gain | |||||||
|---|---|---|---|---|---|---|---|---|---|---|---|
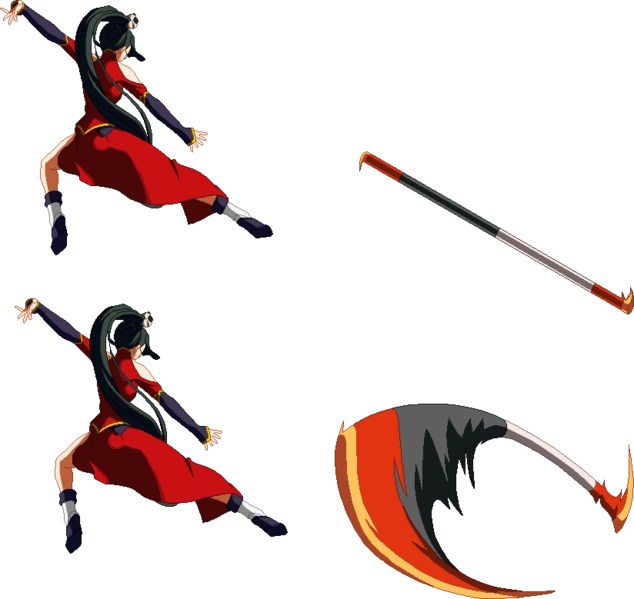
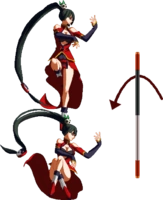
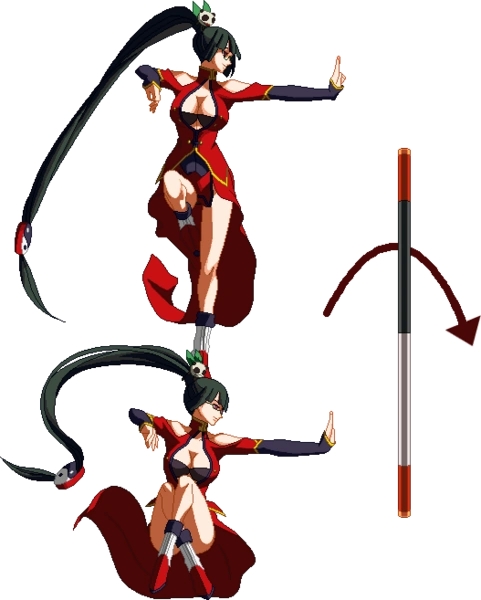
| 萬天棒 Mantenbō | Myriad Heavens Pole | -- | -- | ||||||||

|
Places the staff on the ground. If you launch the Mantenbō with D after this move, it will make it fly up into the air, then loop back to you. | ||||||||||
| Input | Damage | Heat gain | |||||||||
|---|---|---|---|---|---|---|---|---|---|---|---|
| -- | -- | ||||||||||
|
Places the staff on the ground. Slower than 5D. If you launch the Mantenbō with D after this move, it will make it fly low across the ground. | ||||||||||
| Input | Damage | Heat gain | |||||||||
|---|---|---|---|---|---|---|---|---|---|---|---|
| 600*2 | 248*2 | ||||||||||
|
Quickly dashes forward, slams into the opponent with her shoulder, then thrusts her staff into them before placing it on the ground. A decent way to approach the enemy. Can combo into 6B on counter hit. | ||||||||||
| Input | Damage | Heat gain | |||||||||
|---|---|---|---|---|---|---|---|---|---|---|---|
| 800 | 331 | ||||||||||

|
Places the staff on the ground, then spins around it and quickly drives an overhead kick into the opponent. Occasionally useful for getting a CH since the spinning animation can avoid mid-ranged attacks. On CH it is possible to continue with a staffless combo. | ||||||||||
| Input | Damage | Heat gain | |||||||||
|---|---|---|---|---|---|---|---|---|---|---|---|
| 540 | 223 | ||||||||||
|
Shoots the Mantenbō down at an awkward angle. Not much use to this move, not RC'able, but it does beat 6A anti air’s all day. Launching the Mantenbō with D after this move will make it fly low across the ground. | ||||||||||
| Input | Damage | Heat gain | |||||||||
|---|---|---|---|---|---|---|---|---|---|---|---|
(in the air) |
640, 480 | 264, 198 | |||||||||
| Shoots the Mantenbō straight down while diving. If you somehow crossup with this move, it has a 2nd hit (her heel) which hits low. When you launch the Mantenbō with D after this move, it will make it fly up into the air, then loop back to you. | |||||||||||
| Input | Damage | Heat gain | |||||||||
|---|---|---|---|---|---|---|---|---|---|---|---|
| -- | -- | ||||||||||

|
Sets the staff in vertical trajectory, the second hit is a low that is extremely safe on block. Hitting with this move midscreen guarantees a corner carry combo. | ||||||||||
| Input | Damage | Heat gain | |||||||||
|---|---|---|---|---|---|---|---|---|---|---|---|
| -- | -- | ||||||||||
|
Can cancel into any action after the 14th frame. Litchi’s 2C and 3C are not cancelable into 5D, so use this instead. | ||||||||||
| Input | Damage | Heat gain | |||||||||
|---|---|---|---|---|---|---|---|---|---|---|---|
| -- | -- | ||||||||||

|
Can cancel into any action after 27F. Has 7F landing recovery. If you do j.D > air normal > land, you will still have the landing recovery of j.D. | ||||||||||
| Input | Damage | Heat gain | |||||||||
|---|---|---|---|---|---|---|---|---|---|---|---|
with staff in vert. position |
200*2 | 82*2 | |||||||||
|
Vertical Launch Extremely versatile move. It has counter hit carry, so it makes for an excellent anti air. It activates 2F after releasing D, making it tied with All Green for her fastest move (and fastest move in the game), has 19f of hitstun, enabling better followups on the return hit. If Litchi gets hit or blocked, the staff immediately returns to her. | ||||||||||
| Input | Damage | Heat gain | |||||||||
|---|---|---|---|---|---|---|---|---|---|---|---|
with staff in horiz. position |
220*2 | 91*2 | |||||||||
| Helps control ground space. It still has all the great attributes of 5D launch. | |||||||||||
Overdrive[]
| Input | Japanese name | English name | Damage | Heat gain | |||||||
|---|---|---|---|---|---|---|---|---|---|---|---|
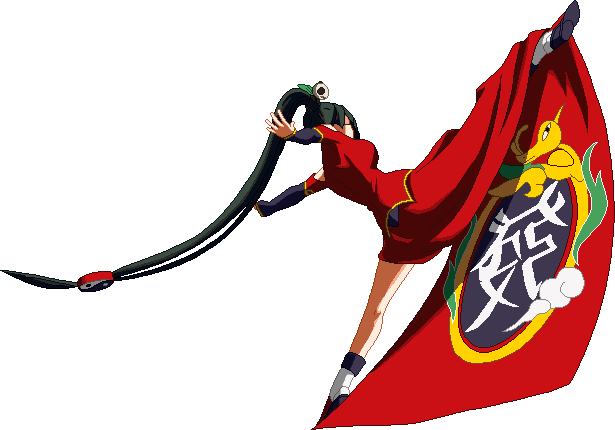
| CT-CS: (with rod) (Midair also) CP: |
大車輪 Daisharin | The Great Wheel | 360*5, 2040 | 0 | |||||||

|
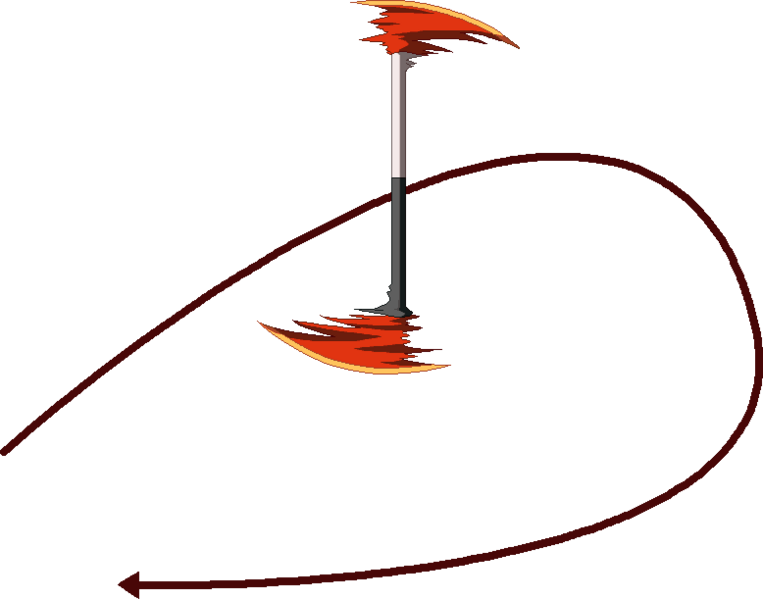
Attacks the opponent by throwing the rod. It is trajectory can be altered by pressing a direction and D. Excellent move in that you have more chances to use it than Thirteen Orphans, and that you can control where it goes. During the start up, you can hit any direction + D. Once the background returns, it will follow that trajectory. Great for extending Mantenbō pressure once in a while. Now acts as her Overdrive in BlazBlue: Chronophantasma. | ||||||||||
Exceed Accel[]
| Input | Japanese name | English name | Damage | Heat gain | |||||||
|---|---|---|---|---|---|---|---|---|---|---|---|
(during Overdrive) |
紅孔雀 Beni Kujaku | Crimson Peacock | 2000 4000 (Active Flow) |
||||||||
|
New move in Centralfiction. Litchi sends her stickman out spinning at he opponent, this hits the opponent into the air where they a finished off with a kick from both sides by Litchi and the stickman. | ||||||||||
Special moves[]
| Input | Japanese name | English name | Damage | Heat gain | |||||||
|---|---|---|---|---|---|---|---|---|---|---|---|
(while holding rod) |
気通貫 Ikki Tsūkan | Straight Through | -- | -- | |||||||

|
The pole wraps around and shields Litchi. Although it does not start right away, once it gets going she will guard point any and all hits. She can do this move on reaction to Nu’s laser across the screen super and guard point them all, for example. She has 3 followups; A, B and C. A is an anti-air, slams them down into the ground. B goes horizontal. C is a low, your prime combo tool. A, B and C all have Mantenbō return states, this is used in combos or if you space with it so you cannot be punished. | ||||||||||
| Input | Japanese name | English name | English localization | Damage | Heat gain | ||||||
|---|---|---|---|---|---|---|---|---|---|---|---|
(while Straight Through) |
追加攻撃 Tsuika Kōgeki | Additional Attack | CT-CS: Additional Attack CP: Follow-up |
710 (A), 730 (A~A), 750 (B), 750 (B~B), 720 (C), 710 (C~C), -- (Stance Break D) | 293 (A), 302 (A~A), 310 (B), 310 (B~B), 298 (C), 293 (C~C) | ||||||
|
Launches the rod toward the opponent. Trajectory changes depending on the button you press. | ||||||||||
| Input | Japanese name | English name | English localization | Damage | Heat gain | ||||||
|---|---|---|---|---|---|---|---|---|---|---|---|
(while holding rod) |
燕返し Tsubame Gaeshi | Swallow Returning | Tsubame Gaeshi | 480, 500, 440, 1000 | 198, 207, 182, 414 | ||||||
|
Launches the rod above Litchi for an anti-air attack. Solid DP. Invincible on start up, comboable into good damage and great positioning, air unblockable. Best times to use it is after something the opponent usually considers safe, IB it and stomp them with this move. When this move places the Mantenbō, it is put in its low trajectory. Be aware of Tsubame Gaeshi countermeasures, people will be baiting this a lot. Cannot be RC’d. | ||||||||||
| Input | Japanese name | English name | Damage | Heat gain | |||||||
|---|---|---|---|---|---|---|---|---|---|---|---|
(While rod is placed) |
三元脚・白 Sangenpai: Haku | Three Dragons: White | 710 | 293 | |||||||

|
Moves forward while performing a low attack. This move is primarily used in combos. | ||||||||||
| Input | Japanese name | English name | Damage | Heat gain | |||||||
|---|---|---|---|---|---|---|---|---|---|---|---|
(While rod is placed) (Midair also) |
三元脚・發 Sangenpai: Hatsu | Three Dragons: Green | 740 (Ground), 760 (Air) | 306 (Ground), 314 | |||||||
|
Rises up while attacking. Can be chain with the other Three Dragon techniques. This is an excellent air to air and beats a lot of moves clean. It is also not techable until they hit the ground. | ||||||||||
| Input | Japanese name | English name | Damage | Heat gain | |||||||
|---|---|---|---|---|---|---|---|---|---|---|---|
(While rod is placed) (Midair also) |
三元脚・中 Sangenpai: Chū | Three Dragons: Red | 700 (Ground), 600 (Ground Followup), 690 (Air), 590 (Air Followup) | 289 (Ground), 248 (Ground Followup), 285 (Air), 244 (Air Followup) | |||||||
|
A charging overhead attack. Can be chain with the other Three Dragon techniques. You can use it like Ragna’s Gauntlet Hades in the air but it is not as useful in that respect. Green and Red are both usable in the air. | ||||||||||
| Input | Japanese name | English name | English localization | Damage | Heat gain | ||||||
|---|---|---|---|---|---|---|---|---|---|---|---|
(while rod is placed) |
立直・単騎待ち Rīchi: Tankimachi | Ready Hand: Pair Wait | Reach: Last Chance | -- | -- | ||||||
|
Jumps onto rod. Press 2 to get off. Also right before you reach the staff after 624A, you can airdash out or whatever you want. | ||||||||||
| Input | Japanese name | English name | Damage | Heat gain | |||||||
|---|---|---|---|---|---|---|---|---|---|---|---|
(after Reach: Last Chance) |
一発 Ippatsu | One Shot | 720 (A), 760 (B), 690 (C) | 298 (A), 314 (B), 285 (C) | |||||||
|
Attacks the opponent from top of rod. A is the fastest, B is not quite as fast, C is rather slow but reaches to the ground (on taller chars at least) and these moves combo into each other. | ||||||||||
| Input | Japanese name | English name | English localization | Damage | Heat gain | ||||||
|---|---|---|---|---|---|---|---|---|---|---|---|
(after Reach: Last Chance) |
槍槓 Chankan | Robbing a Kan | Chan-Kan | ||||||||
| New move from BlazBlue: Chronophantasma. | |||||||||||
| Input | Japanese name | English name | English localization | Damage | Heat gain | ||||||
|---|---|---|---|---|---|---|---|---|---|---|---|
(while rod is placed) |
立直・引っかけ Rīchi: Hikkake | Ready Hand: Trap | Reach: Robbing the Kong | 690 | 285 | ||||||
|
Jumps toward the rod and flings it towards the opponent. Good after a staffless combo where you did not have the meter to RC, because if you slide right into 50 after 624B you can go straight into Thirteen Orphans. | ||||||||||
| Input | Japanese name | English name | English localization | Damage | Heat gain | ||||||
|---|---|---|---|---|---|---|---|---|---|---|---|
(while rod is placed) |
立直・追っかけ Rīchi: Okkake | Ready Hand: Chase | Reach: Kong on Kong | -- | -- | ||||||
|
Jumps toward the rod and uses it to spring towards the opponent. | ||||||||||
| Input | Japanese name | English name | English localization | Damage | Heat gain | ||||||
|---|---|---|---|---|---|---|---|---|---|---|---|
(while rod is placed) |
東南西北 Ton Nan Sha Pei | East, South, West, North | The Four Winds | 520*7 (Vertical Launch), 480*4 (Horizontal Launch) | 215*7 (Vertical Launch), 198*4 (Horizontal Launch) | ||||||
| Launches the rod towards the opponent. It follows standard Mantenbō flying pattern, so depending on how it is placed it will act differently. This move is used in her high/low mixup post-combo. Also if you are doing a blockstring and end it with a move that has a Mantenbō return state, you can cover yourself with this move, it will hit them even if you get hit. | |||||||||||
| Input | Japanese name | English name | English localization | Damage | Heat gain | ||||||
|---|---|---|---|---|---|---|---|---|---|---|---|
(while rod is placed) (Midair also) |
小手返し Kote Gaeshi | Small Hand Reversion | Kote Gaeshi | -- | -- | ||||||
|
Moves rod forward or backward. This extends staffless pressure by reducing the recovery of moves. It is also used in combos. | ||||||||||
| Input | Japanese name | English name | English localization | Damage | Heat gain | ||||||
|---|---|---|---|---|---|---|---|---|---|---|---|
(while rod is placed) (delayable) |
嵌張 Kanchan | Closed Wait | Unarmed Lunge | ||||||||
| New move from BlazBlue: Chronophantasma. | |||||||||||
Distortion Drives[]
| Input | Japanese name | English name | Damage | Heat gain | |||||||
|---|---|---|---|---|---|---|---|---|---|---|---|
(while rod is placed) |
国士無双 Kokushimusō | Thirteen Orphans | 250*16 | 0 | |||||||

|
Transforms the rod and sends it after the opponent to pummel them. Once you get a successful mixup, it will be unburstable. A funny gimmick used is if the staff is placed and you’re being rushed down by the enemy, burst, which will make them fly to the staff, then do this move. You can run over and try to sneak in a mixup. This move is also a VERY situational anti-air. | ||||||||||
| Input | Japanese name | English name | Damage | Heat gain | |||||||
|---|---|---|---|---|---|---|---|---|---|---|---|
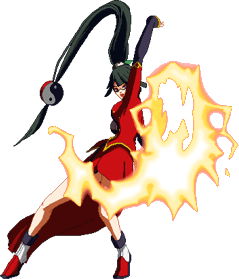
| 緑一色 Ryūisō | All Green | 2000 | 0 | ||||||||
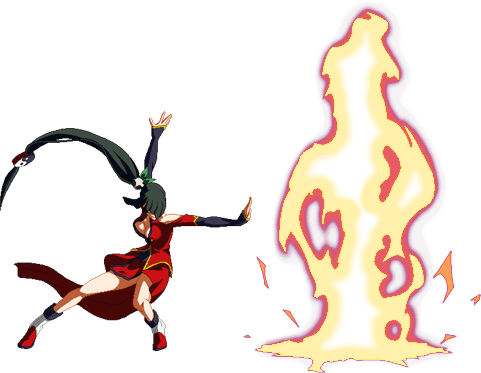
|
Creates a flaming blast in front. Can be used in either mode. The fastest move in the game. On counter, this move leads to MASSIVE damage. Flame pillar, but it leans, so you cannot abuse it out of a blockstring. Inputting it as 64123698C may be easier. On Overdrive, it does 9 continuous upward hits, followed by a 10th downward hit. | ||||||||||
| Input | Japanese name | English name | Damage | Heat gain | |||||||
|---|---|---|---|---|---|---|---|---|---|---|---|
(with or without rod) |
清老頭 Seirōtō | All Terminals | 250*16 | 0 | |||||||
| New move in BlazBlue: Chronophantasma. Litchi rushes forward with a ki-charged punch after a brief whirlwind of energy. After it connects, she pummels the opponent in a “ranbu-styled” autocombo composed of all sorts of kicks from her other attacks. This move’s animation is altered with differing endings depending on if Litchi has her staff or not (more damage with staff, less damage but has better post-combo options without staff). Regardless, the finishing blow for both versions is a powerful leaning palm thrust attack ending with Litchi in a lotus-position. The Overdrive version adds more hits. | |||||||||||
Astral Heat[]
| Input | Japanese name | English name | English localization | Damage | Heat gain | ||||||
|---|---|---|---|---|---|---|---|---|---|---|---|
| (After Reach: Last Chance) CT, CP: Hold CS: |
九蓮宝燈 Chū Ren Pōtō | Pure Nine Gates | Nine Gates of Heaven | Death | 0 | ||||||
|
Litchi swiftly dashes forward and delivers her opponent one hundred kicks. Will lock-on to opponent, but not unblockable. Slightly faster animation in CS. | ||||||||||
[]
| Command list | |||||
|---|---|---|---|---|---|